How to map Salesforce object fields to Ortto fields
By default, when you connect your Salesforce account to Ortto, a number of Salesforce object fields are automatically mapped to Ortto person and organization fields.
For example, a Salesforce contact’s phone number is mapped to Ortto’s system “Phone number” field — the value is populated and/or updated when the Salesforce contact data is synced to Ortto.
When you connect Salesforce to Ortto, you have the option to map system and custom Salesforce object fields to the Ortto field of your choice. The field mapping configuration enables you to customize how Salesforce field values are populated in Ortto to suit your needs.
When mapping Salesforce object fields to Ortto fields, you can also:
- Configure the object’s identifiers (to determine how objects are linked to account, lead or contact fields, or other objects).
- Map Salesforce contacts’ email and SMS permissions to Ortto fields.
Configure Salesforce objects and fields
You can map Salesforce objects to Ortto fields from two locations in Ortto:
- When connecting Salesforce to Ortto, at the Fields step. Or,
- When Salesforce is already connected to Ortto, from the Salesforce data source view, at the Salesforce fields section.


To configure an object’s field mapping:
- When viewing the list of objects, click the down arrow (⌄) to expand an object’s configuration options.
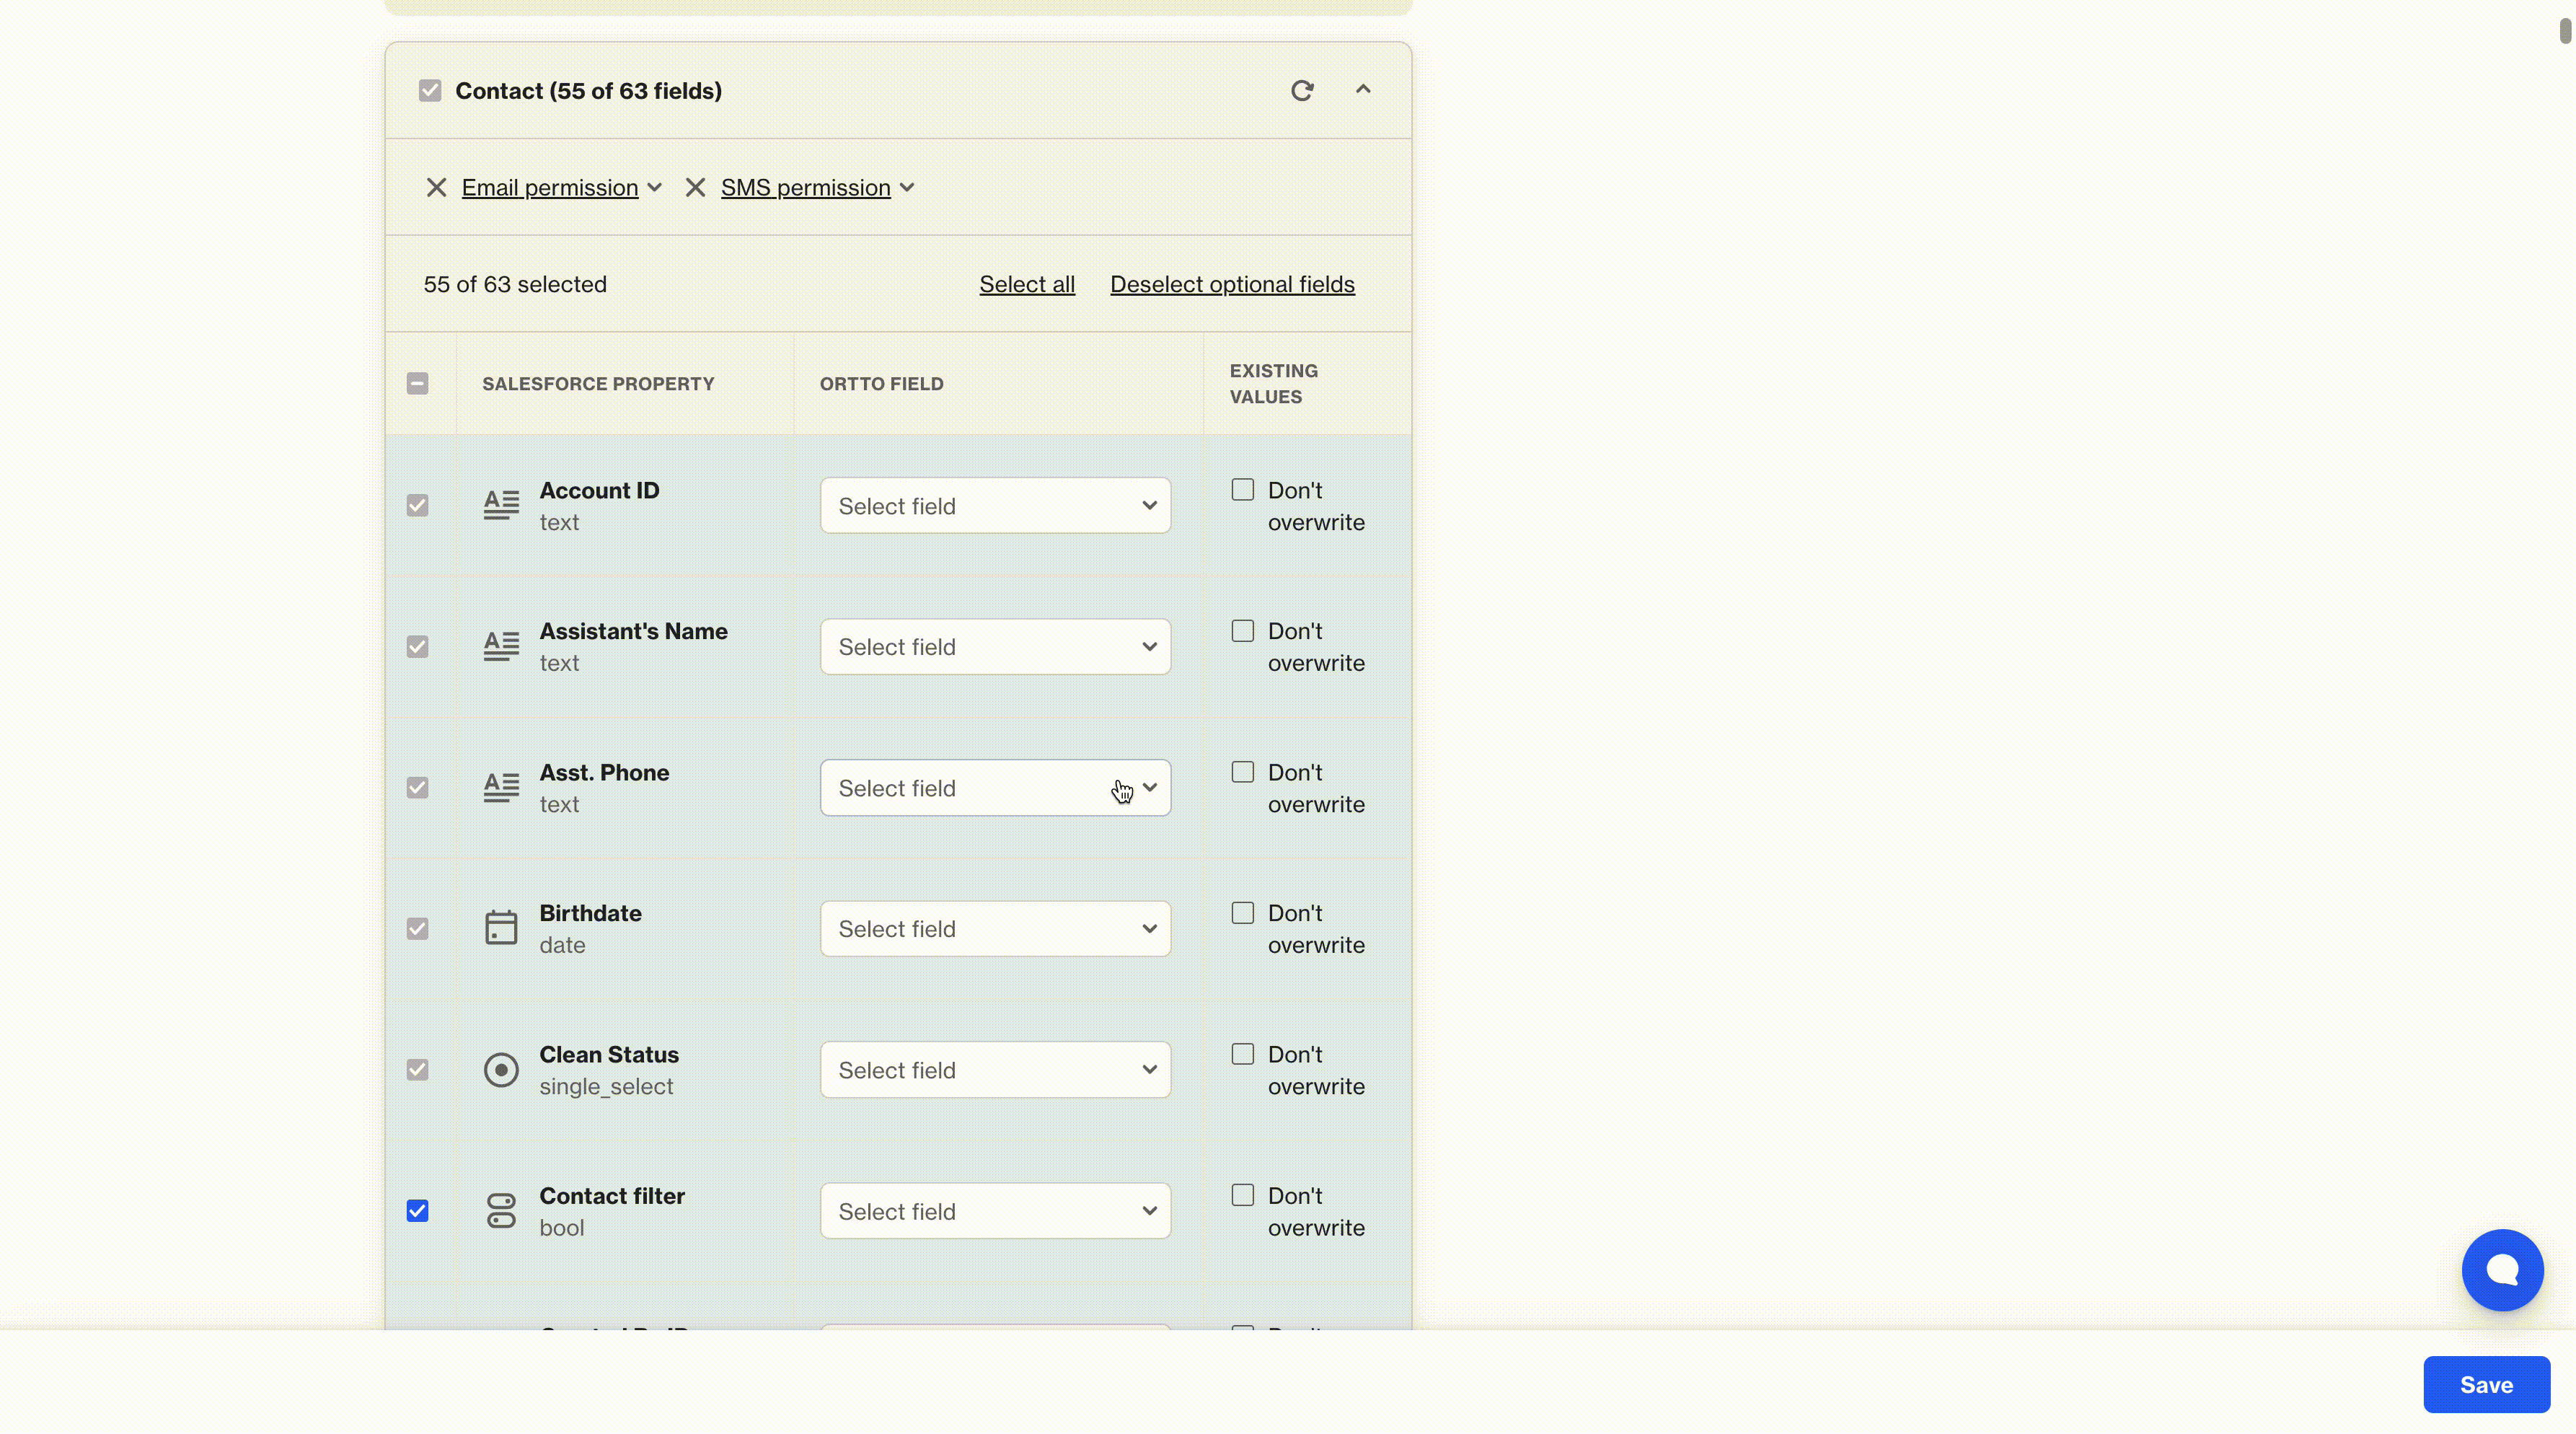
- Select the checkboxes of the Salesforce objects and fields you wish to sync to Ortto.
NOTE: By default, the Contact object and many of its fields are always selected (and cannot be deselected). However, some contact fields can be deselected if not needed.
The default selected fields do not count towards your total field limit of 100 custom contact fields and 50 custom organization fields (cumulative, across all objects).
- At the selected fields, click the down arrow (⌄) to select an Ortto field to map to. If you wish to map one Ortto field to more than one Salesforce field, you will need to select which Salesforce field is the primary field (for data merging purposes). Also, if required, select the Don’t overwrite option to prevent other data sources from updating the field’s value.
- Remain in the object configuration to set the Email permission and SMS permission fields.
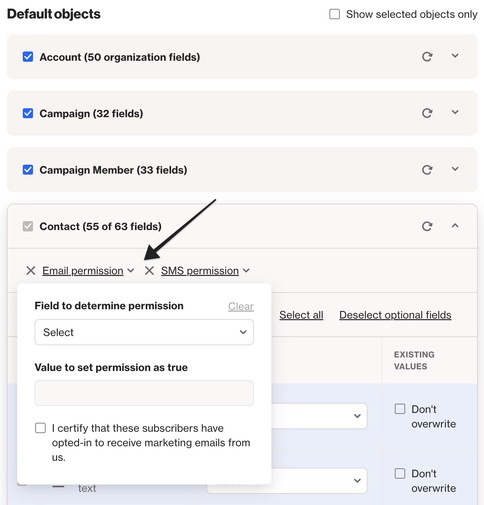
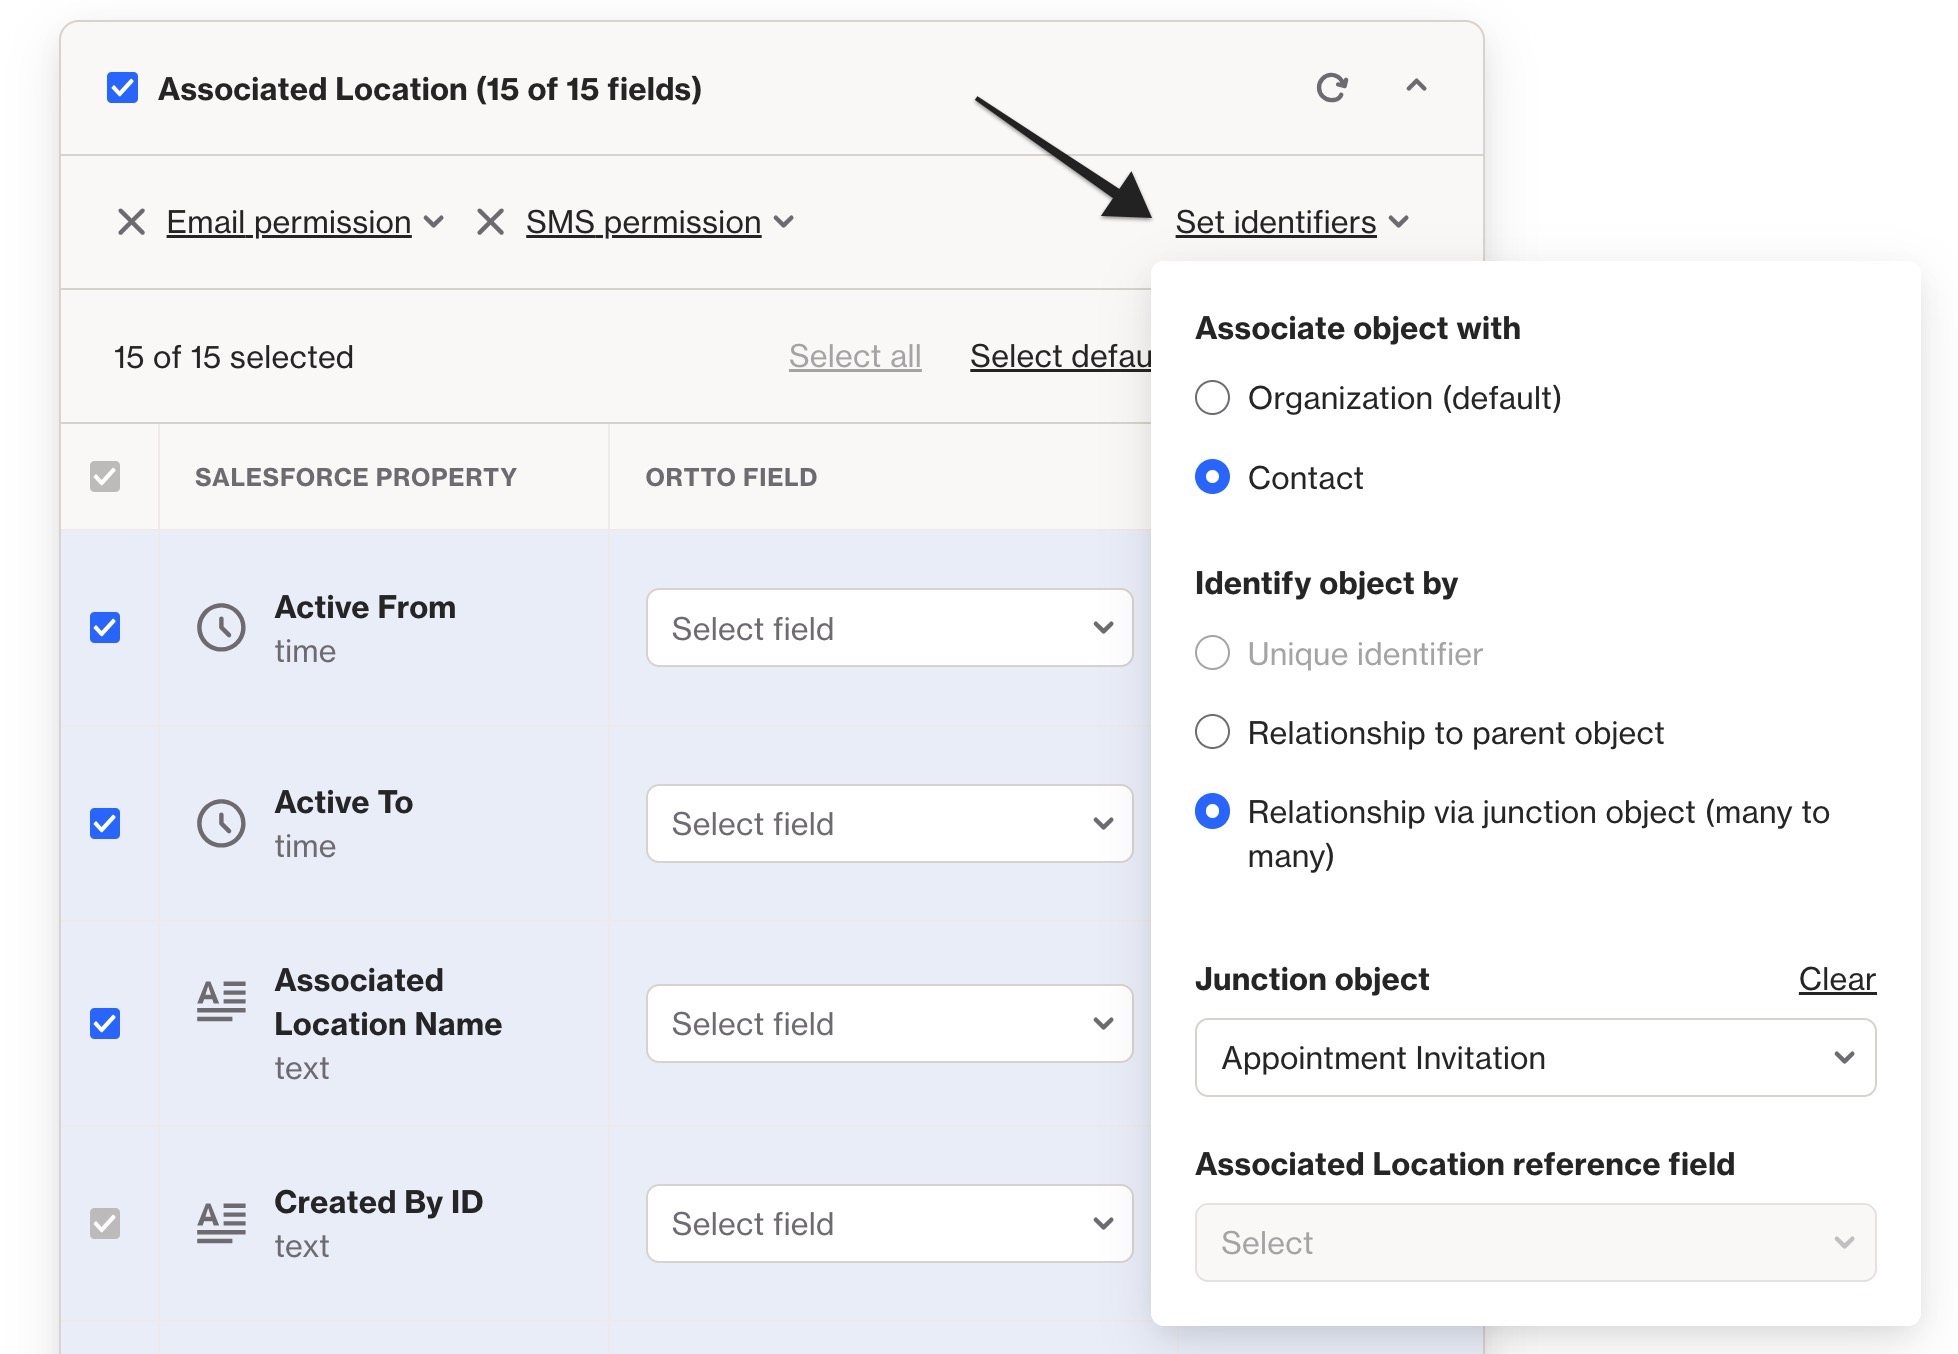
- Where required, click Set identifiers to:
- Determine whether to associate the object as a Contact (person) or an Organization in Ortto.
- Identify the object by a reference ID, unique identifier, relationship to parent object, or relationship to a junction object. Learn more about setting an object's identifiers.
- When you’ve finished selecting and configuring objects to sync to Ortto:
- If performing these steps while connecting to Ortto, click Next to proceed with the remainder of the connection steps,
- If editing an existing Salesforce connection, click Save. Changes to the objects will be implemented upon the next time Ortto syncs with Salesforce (usually every 15 minutes).
NOTE: You can map Salesforce fields in different Salesforce objects to the one Ortto field (e.g. each of the Contact object and Lead object’s “Email” properties are mapped to the same Ortto “Email” field.
Additionally, you can map multiple Salesforce properties within the same object to one Ortto field (e.g. you map one object’s “Work email” and “Personal email” properties to the one Ortto “Email” field. Learn more about mapping multiple fields.

Map multiple Salesforce fields to one Ortto field
You can map multiple Salesforce fields to one Ortto field. For example, you have a Salesforce object with 2 “Email” fields: “Work email” and “Personal email”. You can map each of these Salesforce fields to the Ortto “Email” field.
When you map more than one Salesforce field to the same Ortto field, you will need to choose which Salesforce field takes priority. This means that if you have two Salesforce fields mapped to an Ortto field, and both of those fields contain values, only the top priority field will be mapped to the Ortto field.
The lower priority fields will be treated as fallbacks if the top priority field has no value.
To set the field priority:
- Click the down/up arrows next to the Ortto field.
- Click and drag a lower priority item to make it a top priority.
- Click Ok.